If you want your website to connect and interact with people from all over the world, translating your content is essential. However, for many, translating their website into another language is a difficult task, especially for those with little or no command of the language.
Fortunately, the multilingual Weglot tool allows you to translate your WordPress site automatically and/or manually, helping you reach potential customers in any language.
In this article, we take an in-depth look at what the free WordPress Weglot plugin offers. We discuss its many features and then explain how to install and configure this plugin, step by step. By the end of the reading, you will have the knowledge to translate your WordPress site into the language of your choice.
Weglot: Introduction
Weglot is a multifunctional multilingual platform that can automatically translate your website or blog into more than 100 languages. Machine translations are created using a combination of translation services from Microsoft, DeepL, Google, and Yandex (depending on the language being translated). It also provides a useful context editor that allows you to manually adjust machine translation.
Other Weglot features include …
Ease of use: You can use the Weglot WordPress plugin to seamlessly integrate this multilingual service on your website. Weglot’s features can be accessed through the WordPress admin interface, as well as through Weglot’s intuitive dashboard. Translating your website automatically and configuring settings is extremely quick and easy, allowing you to have your multilingual website up and running in minutes.
SEO: Weglot creates subdomains for new languages so that Google can index each page. It also translates all metadata and adds Hreflang tags to all pages.
Support: Weglot’s knowledge base offers extensive support documentation, including detailed “Getting Started” guides and how-to tutorials, as well as email support.
Weglot offers both a free service and a premium service, but in this article, we will see how to install and use the free WordPress plugin. Although free, this version of Weglot is still a feature-rich product and allows you to translate up to 2000 words into one language.
If you are looking for additional functionality, Weglot Premium packages offer access to professional translation services, team collaboration tools, statistics on translated page views, and much more.
Now that we know what Weglot has to offer, let’s find out how to install the Weglot WordPress plugin and make your website multilingual …
Step 1: Install the Weglot Plugin
The first step in the process of translating your WordPress site is to install the Weglot WordPress plugin. To do this, open the WordPress dashboard and click on the Plugins> Add Plugin menu on the left sidebar.

Then in the search function, type Weglot Translate.
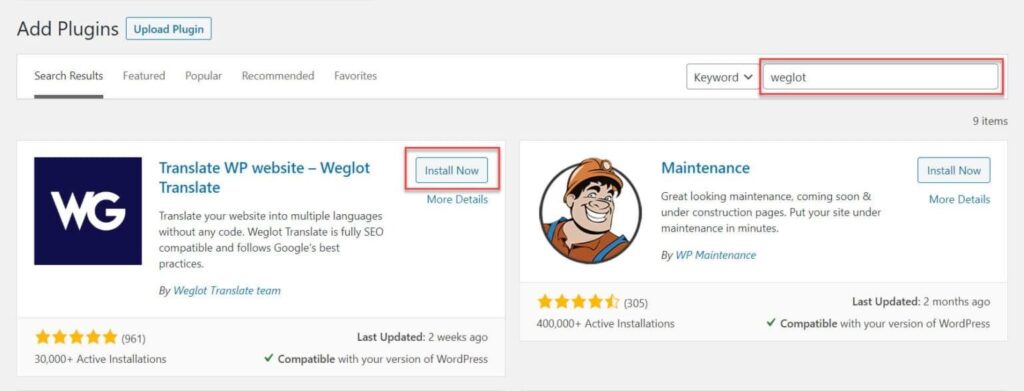
Once WordPress retrieves the plugin, click Install Now> Activate. Weglot will now be installed on your WordPress site and you can access it through the control panel menu.
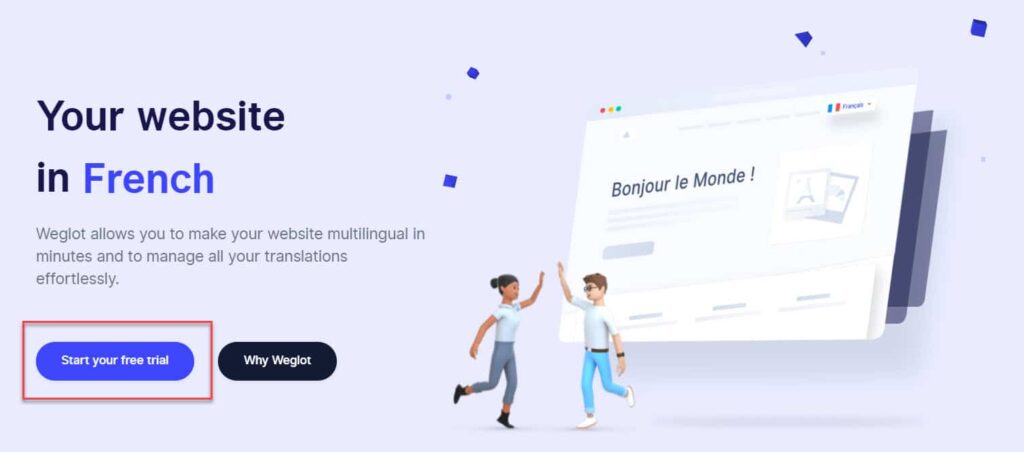
Step 2: Sign Up for a Weglot Account
Once Weglot is installed on your WordPress site, the next step is to sign up for a Weglot account. To do this, open the Weglot website and click Start your free trial.
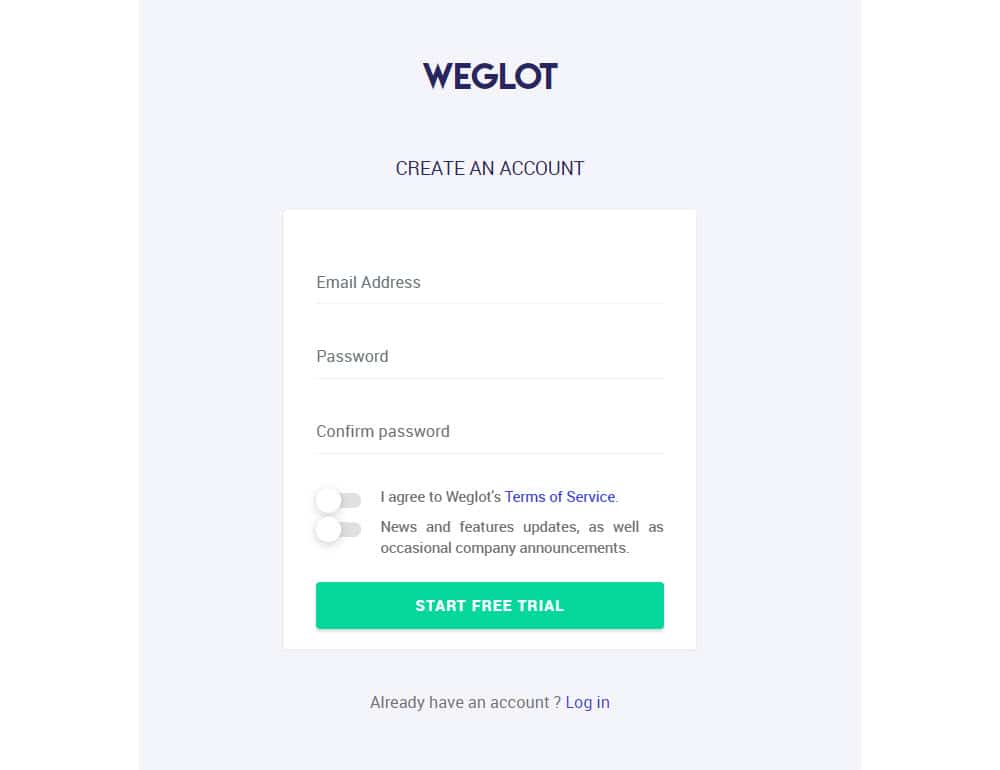
You will now be asked to create a new Weglot account. And don’t worry, the free trial will remain free forever as long as the number of words you translate is less than 2000.
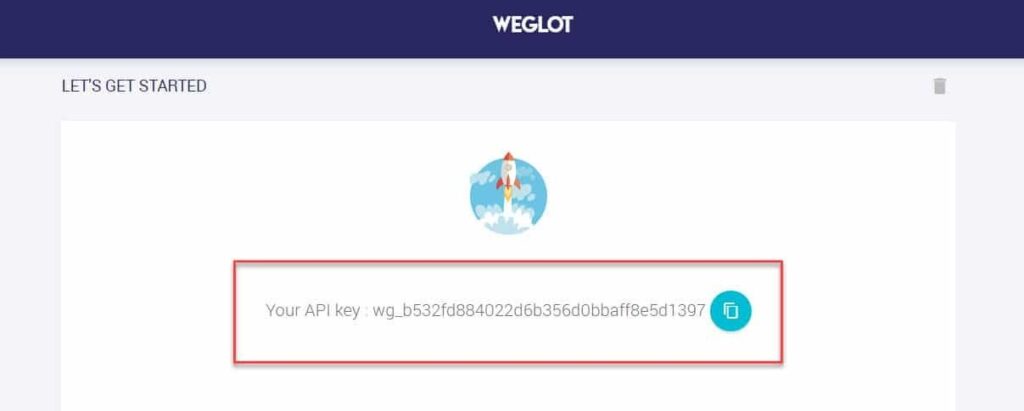
You will then receive an email requesting the validation of your account. After confirming your account, you will be returned to your new Weglot dashboard, where you will find the API key that will allow you to connect your Weglot account to your WordPress site.
Step 3: Connect Your Weglot Account and Choose Your Site’s Destination Language
To connect your Weglot account and WordPress site, copy the API key and go back to the WordPress dashboard. Now select Weglot from the panel menu and under Main Settings paste the API key.
Under the API key, you need to select the original language of the site (this is the language it is written in now) and then the target languages (the languages you want to translate your site into). Once you’ve selected the correct languages for your site, click Save Changes at the bottom of the page.
Remember that if you are using the free version of Weglot, you will only have the option to translate your site into another language.
Step 4: View Your Multilingual Website
Then a pop-up will appear informing you that your site is now multilingual. Click the Go to my home page button to view your site.
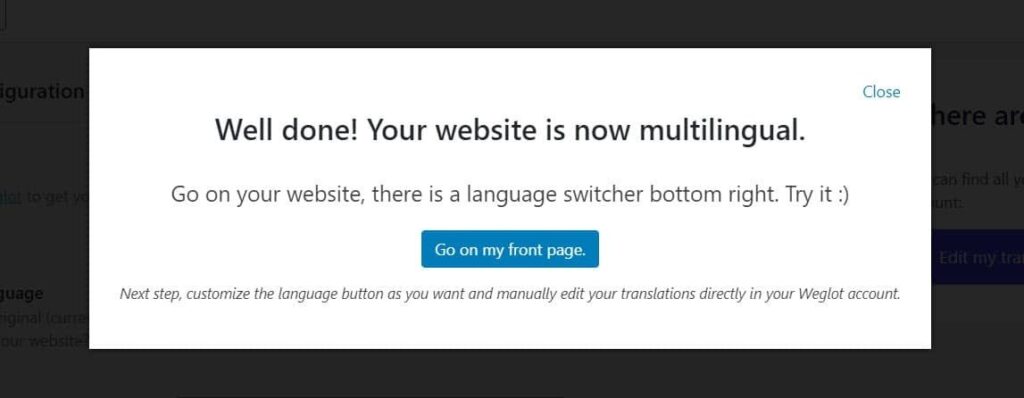
Your website will still be written in its original language at this time. In the lower right corner of the screen, you will find a language selector. Click the switch to select your new language.
You will now see that all of your content has been automatically translated into the second language. You will find that Weglot will translate all of your content, including sidebars, menu, headings, title, and URLs, which is one of the features that makes it such a popular plugin.
Step 5: Customize the Language Switcher
Go back to the WordPress dashboard and scroll down the Weglot> Main Settings page until you reach the Language Button Layout section.
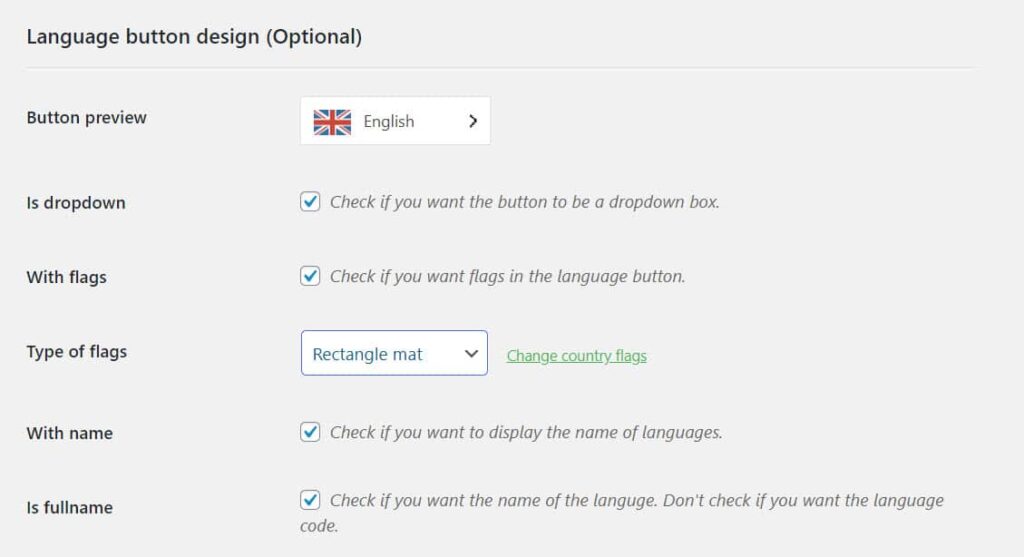
Here you have several options about the appearance of the language switcher. These include …
- Displaying country flags.
- Changing the shape of the flags.
- Using the full names of languages.
You can also choose to override the settings by adding CSS to give the buttons a specific style
Continue scrolling down the page for more information on how to change the location of the language switch. Options include …
- Menu – Add the switcher to your site’s menu bar.
- Sidebar – Display the language switcher in your sidebar or any other widget area.
- Shortcode – Use Weglot’s pre-generated shortcode
[weglot_switcher]to add the switcher within your site’s content. - Source Code – Add
<div id='weglot_here'></div>to the source code of your HTML page to display the language buttons anywhere on your site.
If you make any changes to the language selector, be sure to click the Save Changes button at the bottom of the page.
Step 6: Configure Other Settings
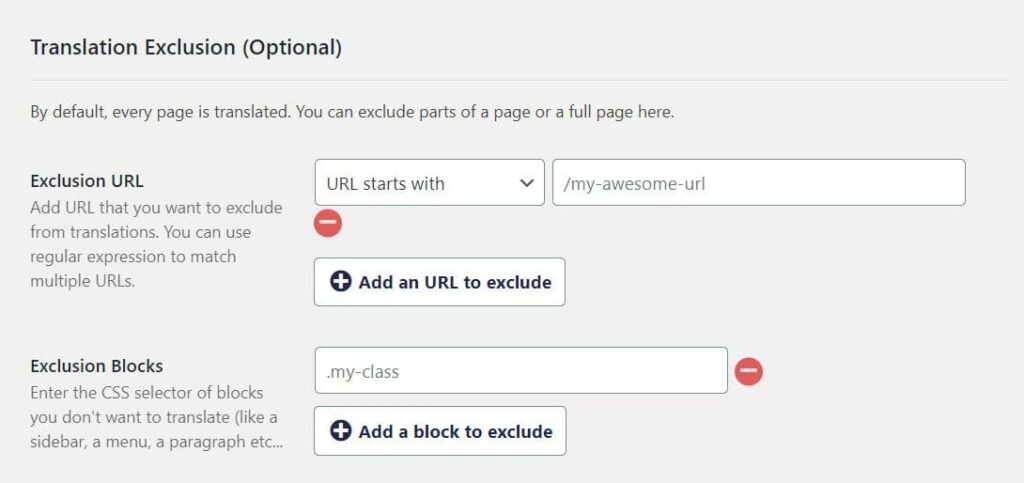
Weglot also gives you control over a variety of other settings. Under Translation Exclusion, you can choose to exclude certain pages or parts of a page from the translation. (By default, Weglot translates all content on every page of your site.) To exclude content, just enter the page URL or CSS selector for the sections you don’t want to translate.
Other useful settings include …
Automatic redirect: select this option to have users redirected to the appropriate translation for your site based on their browser language.
Translate AMP: Choose to automatically translate accelerated pages for mobile devices.
Search functionality: Although only in beta, this feature will allow your users to search your site in the translated language.
Step 7: Manually Edit Translations
Having your site translated automatically is a great service, but there is no guarantee that the translation will be perfect. Fortunately, Weglot offers the option to manually adjust machine translation, a job that can be done in the Weglot interface.
To do this, open your Weglot panel, and from the menu on the left select Visual Editor> Start Editing.
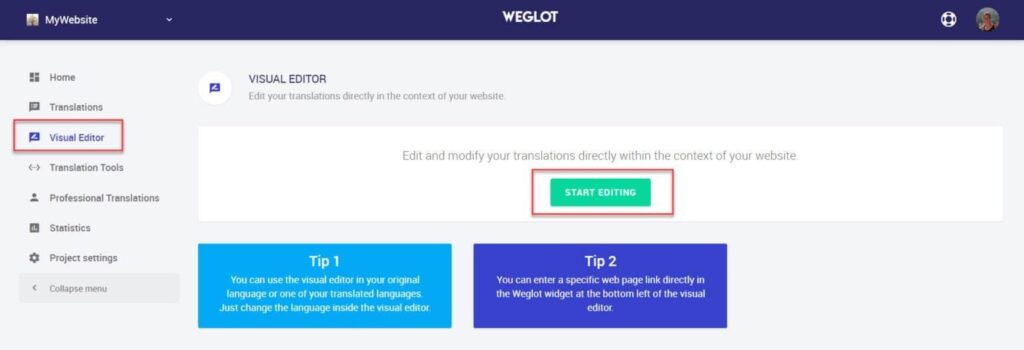
The editor will now open, allowing you to rewrite any translations that don’t work well.
Any changes made in the editor will be automatically uploaded to your live site.
Final Thoughts
Of course, Weglot is an impressive tool. Not only is it quick and easy to set up, but it is also extremely easy to use and packed with useful features. So if you want to translate your WordPress site to a professional standard without the professional price tag, Weglot is the multilingual plugin for you.
Still not sold on Weglot? Then take a look at our collection of the best WordPress translation plugins too.
Have a question about translating your WordPress site using Weglot? If so, feel free to ask in the comments below …