Picture this: You land at the airport of your dream university country. You are exhausted from a long flight. You need to pay for your taxi, your first week’s groceries, your SIM card, and possibly a deposit on your accommodation — all within the first 48 hours. But you have no local bank account. Your home debit card is being charged 3% international transaction fees on every single purchase. The ATM charges you $5 every time you withdraw cash. And your university’s accommodation office wants a local bank transfer for your housing deposit.
This scenario plays out for hundreds of thousands of international students every single year — and every single one of it is completely preventable.
Opening a student bank account abroad before you arrive — or within the first 48 hours of landing — is not just a financial convenience. It is the foundation of your entire financial life abroad. It determines how you receive your scholarship stipend, how you pay your rent, how you access your money without paying punishing fees, and how you build the financial credibility that landlords, utility companies, and employers look for.
This is the complete, step-by-step guide to opening a student bank account abroad in 2026 — covering every major study destination, every document you need, the best banks for international students in each country, the best digital banking alternatives, how to transfer money internationally without losing a fortune to fees, and the most common mistakes students make that cost them hundreds of dollars in unnecessary charges.
Whether you are heading to the USA, UK, Canada, Australia, Germany, Japan, France, or anywhere else — this guide covers you completely.
Table of Contents
Why Opening a Student Bank Account Abroad Is the Single Most Important Financial Step You Will Take
Most study abroad guides treat banking as an afterthought — something to handle after you arrive, after you sort out your accommodation, after you register at university. This is exactly backwards.
Here is why opening your student bank account abroad as early as possible should be your top financial priority:
Your scholarship stipend needs somewhere to land. Whether you are receiving a DAAD stipend in Germany, a Chevening allowance in the UK, a MEXT scholarship payment in Japan, or a Fulbright disbursement in the USA — your scholarship office needs a local bank account to pay you. Without one, you either wait weeks for an international transfer, pay fees on every disbursement, or miss your first payment entirely.
Your accommodation deposit requires local payment. University housing offices, private landlords, and student accommodation providers in every country on this list strongly prefer or exclusively accept local bank transfers. Trying to pay a deposit from a foreign account costs you fees on both ends and often causes delays that can cost you your housing spot.
International card fees destroy your budget. Using your home country debit or credit card for daily purchases in a foreign country typically costs you 2–5% per transaction in currency conversion fees, plus potential ATM withdrawal charges of $3–$8 per withdrawal. For a student spending $1,500 per month, these fees alone can cost $50–$100 per month — $600–$1,200 per year in completely unnecessary charges.
A local bank account builds your financial identity. In most countries, a local bank account is the starting point for building your entire financial infrastructure — your credit history, your ability to set up direct debits for rent and utilities, your eligibility for local SIM card contracts, and in some countries, your access to student discounts and benefits that require a local bank verification.
Some countries require it for visa compliance. Countries like Germany require international students to open a specific type of blocked bank account (Sperrkonto) as part of their visa application — meaning banking is not just helpful but legally mandatory before you even board the plane.
Understanding Your Options — Three Types of Banking Solutions for International Students
Before we go country by country, it is important to understand the three fundamentally different types of banking solutions available to international students in 2026, because the right choice depends on your specific situation, destination country, and timeline.
Option 1: Pre-Arrival Online Banking (Open Before You Land)
Several traditional banks and all major digital banks now allow international students to open accounts entirely online before arriving in their destination country. This is the gold standard approach — arriving with a functioning account and card already in hand.
Best for: Students who want maximum financial readiness from day one, students with urgent housing deposits to pay within the first week, and scholarship recipients who need a receiving account before their first disbursement.
Examples: Wise, Revolut, N26, Monzo, and select traditional banks with online pre-arrival programs (ANZ in Australia, Scotiabank in Canada, Monzo in the UK).
Option 2: Arrival-Day or First-Week Account Opening
Many traditional banks in major study destinations allow international students to open accounts quickly — sometimes within 24 to 48 hours — by visiting a branch with the required documents during the first week of arrival.
Best for: Students who prefer traditional bank infrastructure, students who need features not available with digital banks (certain loan products, certified statements for visa applications), and students in countries where digital bank alternatives are limited.
Examples: Barclays and HSBC in the UK, Chase and Bank of America in the USA, Commonwealth Bank in Australia, Deutsche Bank in Germany.
Option 3: University-Partnered Banking Programs
Many universities have formal partnerships with local banks that streamline the account-opening process for their international students — often providing on-campus account opening events during orientation week, reduced or waived fees, and simplified documentation requirements.
Best for: Students who want the convenience of university support in navigating the banking process, particularly at their first week orientation.
Examples: Most major universities in the UK (Barclays and HSBC both have university partnership programs), Canadian universities (Scotiabank and RBC both operate campus programs), and Australian universities (all major banks operate campus branches).
The Documents You Will Need — Universal Checklist
Regardless of which country you are heading to or which bank you choose, these are the core documents that virtually every bank will require from an international student opening an account abroad. Organize these into a dedicated folder — physical and digital — before you leave home.
Essential Documents for Opening a Student Bank Account Abroad:
✅ Valid Passport Your passport is the primary identification document for any financial institution globally. Ensure it has at least 6 months of validity beyond your intended study period. Banks require both the photo page and the visa/entry stamp pages.
✅ Student Visa or Residence Permit Proof that you are legally authorized to reside in the country. For most countries this means your student visa stamp in your passport. In some countries (Germany, France, Netherlands), you may need to provide your residence permit (Aufenthaltserlaubnis/titre de séjour) which is obtained after arrival — this is why digital banking apps are valuable for the first few weeks while you obtain your formal residence documentation.
✅ University Acceptance or Enrollment Letter An official letter from your university confirming your enrollment in a degree program, your expected study period, and your student status. Most universities provide this automatically as part of their pre-arrival documentation package, but confirm with your admissions office well in advance.
✅ Proof of Address This is the most challenging document for newly arrived international students because you need an address to open a bank account but often need a bank account to secure an address. Solutions:
- Use your university’s official accommodation address (most banks accept this)
- Use your university’s campus address for banking purposes initially
- Use a digital bank that does not require local address proof for initial account opening (Wise and Revolut both accept your home country address)
✅ Student ID Card Your university student ID card is required or extremely helpful for student-specific account types with fee waivers and benefits. Many banks will not open their student account tier without it.
✅ Proof of Income or Scholarship (Where Required) Some banks — particularly for premium student accounts or accounts with higher transaction limits — require evidence of your financial situation. A scholarship award letter, a bank statement from your home country, or a sponsor letter serves this purpose.
✅ Tax Identification Number (Country-Specific)
- USA: Social Security Number (SSN) or Individual Taxpayer Identification Number (ITIN) — note that many banks have programs specifically for international students without an SSN
- UK: National Insurance Number (NIN) — note that you can open most accounts without this initially
- Germany: Steueridentifikationsnummer — assigned automatically after registration
- Canada: Social Insurance Number (SIN) — obtained from Service Canada within your first week
- Australia: Tax File Number (TFN) — applied for online through the ATO
Step-by-Step Guide by Country — How to Open a Student Bank Account Abroad
🇺🇸 STEP-BY-STEP: How to Open a Student Bank Account in the USA
The United States has one of the most complex international student banking landscapes in the world — primarily because most US banks require a Social Security Number (SSN) for standard account opening, and international students on F-1 visas do not automatically receive an SSN (you need authorized employment or a specific visa category).
However, opening a US bank account as an international student is absolutely achievable — you just need to know which banks have programs specifically designed for this situation.
Step 1: Apply for Your SSN or ITIN (Or Find an SSN-Free Bank)
If you have authorized work or teaching assistantship: Apply for your SSN at your local Social Security Administration office within your first two weeks in the USA. Bring your passport, I-20 form, I-94 arrival record, and a letter from your employer or university confirming your authorized employment. SSN processing typically takes 2–4 weeks.
If you do not have authorized employment: You cannot get an SSN, but you have two options:
- Apply for an ITIN (Individual Taxpayer Identification Number) through IRS Form W-7 if you have US tax obligations
- Use a bank that explicitly opens accounts for international students without an SSN — several major banks offer this
Step 2: Choose Your Bank
Best banks for international students in the USA without SSN:
Chase Bank — International Student Banking Chase is one of the few major US banks that has a formal process for opening accounts with a passport and I-20 alone, without requiring an SSN at the time of opening. Visit any Chase branch with your passport, I-20, and university acceptance letter. The Chase Total Checking account has no minimum balance requirement for students. Chase has branches on or near virtually every major US university campus. 👉 Official Website: chase.com
Bank of America — Advantage Banking for Students Bank of America offers student checking accounts with no monthly maintenance fee for qualifying students and has a program for account opening with passport and I-20 without SSN at many branches. Call ahead to your nearest branch to confirm their current international student documentation requirements, as these vary slightly by state. 👉 Official Website: bankofamerica.com/student-banking
Citibank — International Student Account Citibank has one of the most internationally oriented banking infrastructures of any US bank, with formal programs for international students and strong connections to parent bank networks in many countries, making initial transfers from home easier. 👉 Official Website: citibank.com
Wells Fargo — Student Checking Wells Fargo offers student checking with no monthly fee for qualifying students and has a formal process for international student account opening with passport and I-20. 👉 Official Website: wellsfargo.com/student
Alliant Credit Union A fully online credit union with excellent rates, no ATM fees nationwide, and an account opening process accessible to international students. Particularly recommended for students at universities in states with limited Chase or BofA presence. 👉 Official Website: alliantcreditunion.org
Step 3: Gather Your Documents
For US student bank account opening you will need:
- ✅ Valid passport with US visa stamp
- ✅ Form I-20 (Certificate of Eligibility for F-1 students) or DS-2019 (J-1 students)
- ✅ I-94 Arrival/Departure Record (printable from cbp.dhs.gov/i94)
- ✅ University acceptance or enrollment letter
- ✅ US address (university dormitory address is acceptable)
- ✅ SSN if you have one (not required at all banks)
- ✅ Initial deposit (most student accounts require $25–$100 to open)
Step 4: Open Your Account — In Branch or Pre-Arrival Online
Pre-arrival option (recommended): Open a Wise or Revolut account from your home country before departure. Both provide a USD account number and routing number that functions like a US bank account for receiving transfers. Use this for your first 2–4 weeks while you get settled and then open your traditional bank account at a branch.
In-branch opening: Visit your chosen bank branch within your first week, ideally during a weekday morning when branches are less busy. Bring all documents listed above plus physical copies of each. The account opening process typically takes 30–60 minutes and your debit card arrives by mail within 5–7 business days.
Step 5: Set Up Your Account Features
Once your US bank account is open:
- Set up direct deposit immediately — provide your account and routing number to your university’s payroll or scholarship office
- Download your bank’s mobile app and enable mobile check deposit — very common in the USA
- Set up Zelle (free instant transfers between US bank accounts) — essential for splitting rent and utilities with roommates
- Apply for a student credit card through your bank after 3–6 months of account history — building US credit history from day one significantly benefits your financial life during your studies
Best Digital Banking Alternative for USA:
Wise (formerly TransferWise) Wise provides a US dollar account with actual US bank account number and routing number, accessible from any country before you arrive. No SSN required. No monthly fees. Excellent exchange rates for converting money from home. Millions of international students use Wise as their primary or supplementary US banking solution. 👉 Official Website: wise.com
🇬🇧 STEP-BY-STEP: How to Open a Student Bank Account in the UK
The UK banking system is one of the most accessible for international students among all major study destinations. Several UK banks — and digital banks — offer full pre-arrival account opening, and most university cities have multiple branches specifically experienced with international student documentation.
Step 1: Choose Your Bank (Before You Leave Home)
Monzo — Best Pre-Arrival Digital Bank for UK Students Monzo is a UK-regulated digital bank that you can open entirely from your home country using only your passport. No UK address required to start. No monthly fees. Instant spending notifications. Free UK transfers. Competitive exchange rates on foreign currency spending. Most UK international students use Monzo as either their primary account or as a bridge account during their first weeks. 👉 Official Website: monzo.com
Starling Bank — Best Full-Service Digital Bank in UK Starling Bank offers a full current account with UK sort code and account number, opening accessible from abroad with just a passport. No monthly fees. Excellent interest rates on balances. Strong app. Accepts international address for initial registration. 👉 Official Website: starlingbank.com
Barclays — Best Traditional Bank for UK International Students Barclays has a dedicated international student account program and partnerships with many UK universities. You can begin the application process online before arrival. Barclays Student Additions account has no monthly fee and includes useful student features. 👉 Official Website: barclays.co.uk/student-banking
HSBC — Best for Students With Home Country HSBC Accounts If you have an HSBC account in your home country, HSBC’s international connectivity allows you to transfer money between accounts at significantly lower cost and open a UK student account with simplified documentation. 👉 Official Website: hsbc.co.uk/student-bank-account
Santander — Best for Overdraft and Railcard Benefit Santander’s 123 Student Account offers a free 4-year 16-25 Railcard (worth £105) and an interest-free overdraft of up to £1,500 — one of the most valuable financial benefit packages of any UK student account. 👉 Official Website: santander.co.uk/personal/current-accounts/student
Step 2: Gather Your Documents for UK Student Bank Account
- ✅ Valid passport
- ✅ UK student visa (BRP — Biometric Residence Permit, collected after arrival)
- ✅ University acceptance letter (UCAS offer letter or university enrollment confirmation)
- ✅ Proof of UK address (university accommodation letter, or hall of residence confirmation)
- ✅ Student ID (once issued by your university)
Important note: For digital banks (Monzo, Starling, Revolut), you can open an account with just your passport and a selfie video — no UK address or BRP required at the point of opening. This makes them ideal for pre-arrival setup.
Step 3: The Pre-Arrival Strategy (Recommended)
2–4 weeks before departure: Download the Monzo or Starling app. Complete identity verification using your passport. Your UK account (with sort code and account number) is active within 24–48 hours. Order your card to your home address if timing allows, or to your UK university address.
On arrival day: Your Monzo or Starling card works immediately for contactless payments across the UK. Use it for your taxi, first grocery shop, and SIM card purchase — all without international fees.
During orientation week: Open your traditional bank account (Barclays, HSBC, Santander, or NatWest) at a branch near campus. This gives you access to features digital banks do not offer — certified bank statements for visa renewals, overdraft facilities, and in-person customer support. Provide your Monzo/Starling account details to your scholarship office as your immediate payment receiving account while you wait for your traditional account.
Step 4: Set Up Your UK Account Features
- Register for online banking and your bank’s mobile app immediately
- Set up Direct Debit for your university tuition payment plan if applicable
- Register for Faster Payments — instant free bank transfers within the UK
- Apply for an NHS registration — your bank account address helps confirm your UK residency for NHS GP registration
- Set up a standing order for rent if you are in private accommodation
🇨🇦 STEP-BY-STEP: How to Open a Student Bank Account in Canada
Canada has one of the most internationally student-friendly banking systems in the world, with major banks specifically designing programs to attract and serve international students from the moment of their visa approval.
Step 1: Open Your Account Online Before You Leave Home
Scotiabank StartRight Program — Best Pre-Arrival Bank for International Students in Canada Scotiabank’s StartRight Program is specifically designed for newcomers and international students and allows you to begin the account opening process entirely online from your home country before departure. It offers no monthly banking fees for 2 years, no minimum balance requirements, unlimited free transactions, and a dedicated phone line for newcomers who need English and multilingual support. 👉 Official Website: scotiabank.com/startright
RBC International Student Banking RBC offers pre-arrival online account opening for international students with just a passport. The RBC Student Banking Account has no monthly fee for students and provides access to RBC’s enormous ATM network across Canada. 👉 Official Website: rbc.com/student-banking
TD Student Banking TD Bank’s student account program offers no monthly fees for qualifying students and has a strong digital banking platform. TD has a particularly large branch and ATM network in Ontario and Quebec — Canada’s two most popular student provinces. 👉 Official Website: td.com/student-banking
CIBC Smart Account for Students CIBC offers one of the most comprehensive student banking packages in Canada, including no monthly fee for students, unlimited transactions, and access to CIBC’s Aventura rewards program on their student credit card. 👉 Official Website: cibc.com/student
Step 2: Gather Your Documents for Canadian Student Bank Account
- ✅ Valid passport
- ✅ Canadian study permit (student visa) or confirmation of study permit letter
- ✅ University acceptance letter
- ✅ Canadian address (university dormitory address is accepted)
- ✅ Social Insurance Number (SIN) — apply at any Service Canada location within your first week. Bring your passport and study permit. SIN is issued the same day.
- ✅ Initial deposit (most Canadian student accounts require CAD $0–$50 to open)
Step 3: Apply for Your SIN Card Immediately
Your Social Insurance Number (SIN) is Canada’s equivalent of the USA’s SSN — required for employment, tax filing, and some banking services. Visit any Service Canada office with your passport and study permit and receive your SIN the same day. This should be one of your first three tasks after arriving in Canada — it unlocks almost everything else in the Canadian financial system.
Step 4: Set Up Your Account Features
- Enable Interac e-Transfer — Canada’s free instant transfer system, used universally for rent, bill splitting, and personal transfers
- Set up mobile deposit through your bank’s app
- Apply for a student credit card to begin building Canadian credit history
- Register for CRA My Account (Canada Revenue Agency) — required for tax filing and accessing government student benefits
🇦🇺 STEP-BY-STEP: How to Open a Student Bank Account in Australia
Australia offers some of the most streamlined international student banking processes in the world, with all major banks offering pre-arrival online account opening and university campuses featuring bank branches specifically staffed to handle international student documentation.
Step 1: Open Your Account Before You Leave Home
ANZ — Best Pre-Arrival Bank for International Students in Australia ANZ’s ANZ Access Advantage account can be opened online from any country before arriving in Australia. You provide your passport details, expected arrival date, and Australian address (your university’s address works) and your account is activated before you land. Your card is ready to collect from your nearest ANZ branch on your arrival day — an extraordinarily convenient system. 👉 Official Website: anz.com.au/personal/bank-accounts/international-students
Commonwealth Bank — Best for Campus Presence CBA (CommBank) has branches or ATMs on virtually every Australian university campus, making it the most accessible bank for students. The Complete Access account has no monthly fee for full-time students under 25. You can begin the account opening process online before arrival. 👉 Official Website: commbank.com.au/student
NAB (National Australia Bank) — Best App and Digital Features NAB offers strong digital banking features and a fee-free account for students. Their app is consistently rated among the best among Australian banks. 👉 Official Website: nab.com.au/everyday-banking/savings-accounts/uni-student
Westpac — Best for International Transfer Features Westpac has strong international money transfer integration and is particularly recommended for students who will be regularly receiving money from parents abroad. 👉 Official Website: westpac.com.au/personal-banking/bank-accounts/student
Step 2: Gather Your Documents for Australian Student Bank Account
- ✅ Valid passport
- ✅ Australian student visa (subclass 500) — already stamped in your passport or as an electronic visa grant notice
- ✅ University enrollment confirmation
- ✅ Australian address (university dormitory or expected accommodation address)
- ✅ Tax File Number (TFN) — apply online at ato.gov.au before or immediately after arrival. Takes 1–4 weeks to receive. You can open most accounts without it initially.
Step 3: Set Up PayID
Once your Australian bank account is open, set up PayID — Australia’s instant payment system that links your phone number or email to your bank account. PayID allows anyone to send you money instantly without needing your full account number and BSB. This is how Australian students pay rent, split bills, and receive money — know how to use it from day one.
🇩🇪 STEP-BY-STEP: How to Open a Student Bank Account in Germany
Germany has a unique banking requirement that makes it different from every other country on this list — the Sperrkonto (blocked account), which is legally required for most international students as part of the visa application process. Understanding this system is critical before you begin any other banking steps.
Step 1: Understand the Sperrkonto (Blocked Account) Requirement
A Sperrkonto is a special type of blocked bank account required by German immigration authorities to prove that international students have sufficient funds to support themselves during their studies. As of 2026, you must show approximately €11,208 per year (€934/month) deposited in a blocked account before your student visa can be issued.
The money in the Sperrkonto is “blocked” — you cannot withdraw it all at once. Instead, €934 is released to you each month during your studies, functioning as a guaranteed monthly living allowance.
Opening a Sperrkonto must happen before your visa application — this means it is literally the first banking step for Germany-bound students.
Step 2: Open Your Sperrkonto (Before Visa Application)
Fintiba — Best and Most Popular Sperrkonto Provider Fintiba is the most widely used Sperrkonto service for international students heading to Germany, offering fully online account opening from any country, fast processing (typically 3–5 business days), and excellent English-language customer support. The annual fee is approximately €89. 👉 Official Website: fintiba.com
Expatrio — Best Value Sperrkonto Option Expatrio offers Sperrkonto opening with slightly lower fees than Fintiba and additional services including health insurance packages. 👉 Official Website: expatrio.com
Deutsche Bank — Traditional Sperrkonto Deutsche Bank offers a traditional Sperrkonto for students who prefer working with a major established bank. Account opening can be initiated online but may require in-branch completion. 👉 Official Website: deutsche-bank.de/pk/studentenbank
Step 3: Open Your Regular German Bank Account After Arrival
Once you arrive in Germany and register your address (Anmeldung — mandatory within 2 weeks of arrival at your local Einwohnermeldeamt office), you can open a regular German bank account.
N26 — Best Digital Bank in Germany for International Students N26 is Germany’s most popular digital bank and can be opened entirely online with just your passport and a selfie video. No branch visit required. Free basic account with no monthly fee. English-language app and customer support. N26 is the overwhelming choice among international students in Germany for day-to-day banking. 👉 Official Website: n26.com
DKB (Deutsche Kreditbank) — Best Traditional Online Bank DKB offers a free current account with a Visa credit card usable fee-free worldwide. Very popular among German students. Account opening requires German address registration (Anmeldung). 👉 Official Website: dkb.de
Commerzbank — Best for Branch Support Commerzbank’s student account is free for full-time students and has a large branch network across Germany. Good choice for students who prefer in-person banking support. 👉 Official Website: commerzbank.de/studenten
Step 4: Complete Anmeldung (Address Registration)
Within 14 days of arriving in Germany, you must register your address at your local Einwohnermeldeamt (residents’ registration office) or Bürgeramt (citizens’ office). This is legally mandatory and you will receive your Meldebescheinigung (registration certificate) — a document required to:
- Open most traditional German bank accounts
- Register for German health insurance (Krankenkasse)
- Obtain your German tax ID (Steueridentifikationsnummer)
- Sign up for mobile phone contracts
Bring your passport, your rental contract or university accommodation letter, and your visa. The process is free and typically takes 15–30 minutes.
🇫🇷 STEP-BY-STEP: How to Open a Student Bank Account in France
France’s banking system is excellent but has historically been one of the more challenging for international students due to documentation requirements. Digital banking has significantly simplified the process in recent years.
Step 1: Open a Digital Account Before Arrival
Revolut — Best Pre-Arrival Option for France Revolut can be opened from any country with just a passport and email address. Provides a French IBAN (bank account number) for receiving salary, scholarships, and transfers. No monthly fee on the basic plan. Strong currency conversion rates. 👉 Official Website: revolut.com
Wise — Best for Receiving Scholarship Payments Wise provides a real French IBAN accepted by most scholarship programs including Campus France and Eiffel Excellence scholarship payments. 👉 Official Website: wise.com
Step 2: Open a Traditional French Bank Account After Arrival
BNP Paribas — Compte Hello (Student Account) BNP Paribas’s online division Hello Bank offers a free student account with no monthly fees, full French IBAN, and an excellent mobile app. Can be opened online after arrival with your French address. 👉 Official Website: hellbank.fr
Société Générale — Sobrio Student Account Société Générale has branches on many French university campuses and offers fee-free student accounts with strong digital banking features. 👉 Official Website: societegenerale.fr/particuliers/comptes-et-cartes
La Banque Postale — La Banque Postale Student Account La Banque Postale (the post office bank) is one of the most accessible banks for newly arrived international students in France, with post office locations everywhere and simplified international student account opening. 👉 Official Website: labanquepostale.fr
Documents Required for French Student Bank Account:
- ✅ Valid passport
- ✅ French long-stay student visa (VLS-TS) — validated online within 3 months of arrival at ofii.fr
- ✅ University enrollment certificate (certificat de scolarité)
- ✅ French proof of address (attestation de logement from CROUS, university, or landlord)
- ✅ CAF housing benefit application reference (if applying)
🇯🇵 STEP-BY-STEP: How to Open a Student Bank Account in Japan
Japan’s banking system operates differently from Western countries — it is primarily cash-based for daily transactions, with bank cards used mainly for ATM withdrawals. Understanding this cultural context helps you set up your Japanese banking correctly from the start.
Step 1: Open Japan Post Bank (Yucho Bank) Account — The Easiest First Account
Japan Post Bank (ゆうちょ銀行) — Best First Account for International Students Japan Post Bank is operated through Japan’s post office network — the largest ATM network in Japan with over 32,000 locations nationwide. It is consistently the easiest bank for newly arrived international students to open an account at, with relatively straightforward documentation requirements and English-speaking support at major branches.
Japan Post Bank requires:
- ✅ Valid passport
- ✅ Residence card (在留カード, Zairyu Card) — issued at the airport upon entry for students with valid visas
- ✅ Japanese address (registered at your local city hall)
- ✅ Personal seal (ハンコ, hanko) OR signature
👉 Official Website: jp-bank.japanpost.jp/en
Step 2: Complete Juminhyo Registration (Address Registration)
Within 14 days of arriving in Japan, register your address at your local city hall (市役所, shiyakusho) or ward office (区役所, kuyakusho). This is legally mandatory and gives you:
- Your Juminhyo (住民票) — residence certificate required for bank accounts
- Your My Number (マイナンバー) notification — Japan’s tax identification system
- Full activation of your Residence Card (在留カード)
Bring your passport and residence card. The registration is free and typically takes 20–30 minutes.
Step 3: Open a Convenience Store Bank Account for Daily Transactions
Japanese convenience stores — 7-Eleven (Seven Bank), Lawson (Lawson Bank), and FamilyMart — all have their own ATM networks and basic banking services. Seven Bank in particular offers international students quick account opening through their app, and their ATMs accept international cards for withdrawal.
Step 4: Set Up Your University’s Financial System
Most Japanese universities have their own designated bank where scholarship payments and tuition transactions occur — often a specific branch of MUFG (Mitsubishi UFJ Financial Group) or Mizuho Bank. Your university will provide specific instructions during orientation on which bank and account type is required for your specific program.
The Best Digital Banking Apps for International Students — Complete Comparison
For every country on this list, these digital banking applications provide the fastest, most accessible, and most cost-effective banking solutions — many openable from your home country weeks before departure.
1. Wise (Formerly TransferWise)
Best for: International money transfers, multi-currency accounts, receiving scholarship payments
Wise is without question the most valuable financial tool for international students in 2026. It provides real bank account details (account number, routing number/sort code/IBAN as appropriate) in USD, GBP, EUR, AUD, CAD, and many other currencies — all in a single account. It uses the real mid-market exchange rate (the rate you see on Google) with a small transparent fee, rather than the inflated rates charged by traditional banks.
Key features for students:
- Open from any country with just a passport — no local address required
- Hold and manage 50+ currencies simultaneously
- Receive scholarship payments in local currency with real local account details
- Send money home to family or receive transfers from parents at minimal cost
- Debit card that converts currencies automatically at the real exchange rate
Typical savings vs traditional bank international transfers: 4–7 times cheaper per transaction
👉 Official Website: wise.com
2. Revolut
Best for: Daily spending abroad, budgeting features, cryptocurrency, travel insurance add-ons
Revolut is Europe’s most popular digital bank and one of the most feature-rich financial apps available to international students globally. The Standard (free) plan includes a physical and virtual Mastercard, currency exchange at interbank rates up to a monthly limit, instant spending notifications, and spending analytics.
Key features for students:
- Open from 40+ countries with just a passport
- Instant currency exchange in 150+ currencies
- Savings vaults with interest
- Split bill features (excellent for shared accommodation)
- Disposable virtual cards for online shopping security
- Travel insurance available as an add-on
Important note: Revolut’s free plan has a currency exchange limit (currently $1,000/month) — above this limit, exchange fees apply. For heavy users, the Premium plan (approximately $10/month) removes this limit.
👉 Official Website: revolut.com
3. N26 (Europe)
Best for: Students in the Eurozone — Germany, France, Italy, Spain, Austria, Netherlands
N26 is a German-headquartered digital bank with a full European banking license, meaning accounts include a genuine German IBAN accepted everywhere in Europe. For students studying in any Eurozone country, N26 is one of the most convenient and practical banking solutions available.
Key features for students:
- Open from 24 European countries with just a passport and selfie
- Free basic account with no monthly fee
- Real-time transaction notifications
- Free ATM withdrawals (limited per month on free plan)
- English, German, French, Spanish, Italian, and Portuguese support
👉 Official Website: n26.com
4. Monzo (UK)
Best for: Students in the UK — the single best UK student banking app
Monzo is a UK-regulated bank (not just a fintech app) with a full banking license and FSCS deposit protection up to £85,000. For international students in the UK, Monzo is the closest thing to a perfect banking solution — fast to open, easy to use, and free.
Key features for students:
- Open from any country before you arrive in the UK
- Full UK bank account (sort code and account number)
- Instant spending notifications
- Budgeting tools and savings pots
- Fee-free spending abroad (ATM withdrawals free up to £200/month)
- Salary/stipend direct deposit with early payment notification
👉 Official Website: monzo.com
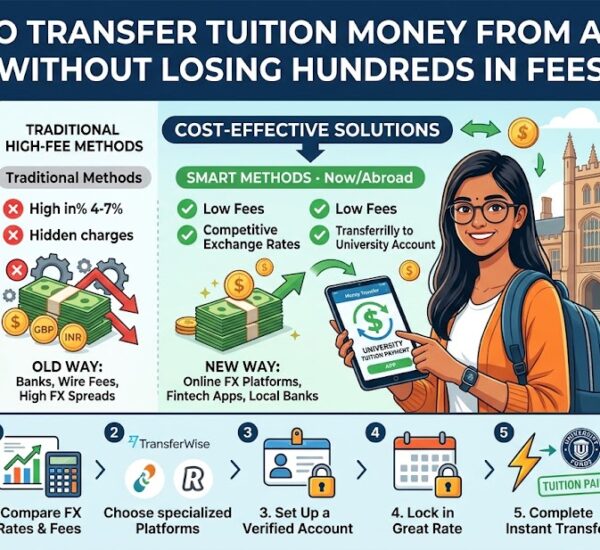
How to Transfer Money From Your Home Country to Your Study Abroad Account
One of the most expensive mistakes international students make is using their home bank’s international transfer service to move money abroad. Traditional bank international wire transfers typically charge $25–$45 per transfer plus an exchange rate margin of 2–5% — meaning a $2,000 transfer to cover your first month’s expenses could cost you $90–$140 in fees alone.
Here are the best methods for international money transfer as a student:
Method 1: Wise (Best Overall)
Wise charges a small transparent fee (typically 0.4–1.5% of the transfer amount) and uses the real mid-market exchange rate. A $2,000 transfer via Wise costs approximately $8–$30 in fees compared to $90–$140 via traditional banks. For a student making 12 monthly transfers per year, Wise saves approximately $700–$1,500 annually. 👉 wise.com
Method 2: Remitly
Remitly specializes in transfers from the USA and UK to developing countries — ideal for receiving money from family. Offers promotional rates for first-time users and fast transfer times (often within minutes). 👉 remitly.com
Method 3: OFX
OFX specializes in larger transfers ($1,000+) and offers some of the most competitive rates for high-value transfers. Excellent for moving scholarship funds or receiving tuition payments from parents. 👉 ofx.com
Method 4: Your Bank’s International Transfer
Use only as a last resort. Most banks charge high fees and poor exchange rates. If you must use your bank, check whether it participates in the SWIFT GPI network (faster tracking) and ask specifically about exchange rate margins before confirming the transfer.
Common Mistakes International Students Make With Banking Abroad — And How to Avoid Them
Mistake 1: Waiting until after arrival to start the banking process. The students who arrive with a functioning Wise or Monzo account, or who have already initiated their traditional bank application, start their academic life with zero financial stress. Those who wait spend their first week scrambling for cash, paying ATM fees, and potentially missing accommodation payment deadlines.
Mistake 2: Using their home country debit card for everything. International transaction fees of 2–5% per purchase, plus ATM withdrawal fees of $3–$8 each, add up to hundreds of dollars per year in completely unnecessary charges. Open a local account or use Wise/Revolut within your first week.
Mistake 3: Not understanding the Sperrkonto requirement for Germany. Germany-bound students who discover the Sperrkonto requirement three weeks before departure face a genuine crisis — the account takes time to open and fund, and without it your visa cannot be processed. Learn about country-specific requirements at least 3 months in advance.
Mistake 4: Giving the wrong account details to the scholarship office. Providing your home country account details, an old IBAN that has changed, or account details with a single digit error to your scholarship office causes payment delays of 2–6 weeks. Double-check and triple-check every digit of the account details you submit.
Mistake 5: Not building local credit history. Students who rely entirely on their home country credit background miss the opportunity to build a credit history in their study country — which matters for apartment rentals, local phone contracts, and post-graduation financial life if they plan to stay or return.
Mistake 6: Keeping all money in one account. Always maintain at minimum a two-account strategy — your primary local account for daily use, and a Wise or Revolut account as a backup. Technology fails, cards get lost, and banks impose unexpected holds. Having a backup financial source has saved many students from genuine emergencies.
Your Complete Pre-Departure Banking Checklist
Use this checklist to confirm you have completed every banking step before boarding your flight.
6–8 Weeks Before Departure:
- ☐ Research your destination country’s specific banking requirements
- ☐ If heading to Germany: Open your Sperrkonto with Fintiba or Expatrio and fund it
- ☐ Open a Wise account from your home country
- ☐ Open a Revolut or Monzo account if heading to Europe or UK
- ☐ Research which traditional bank is best for your destination and begin pre-arrival online application if available
2–4 Weeks Before Departure:
- ☐ Confirm your Wise/Revolut/Monzo account is fully verified and card is ordered
- ☐ Gather all required documents for local bank account opening (see country-specific lists above)
- ☐ Notify your home bank of your upcoming international travel dates to prevent card blocks
- ☐ Set up international calling on your phone plan to handle any banking calls during transition
Final Week Before Departure:
- ☐ Make physical and digital copies of all banking documents
- ☐ Confirm your digital bank card works for international spending
- ☐ Exchange a small amount of local currency (equivalent of $100–$200) for your first 24 hours before ATMs or banks are accessible
- ☐ Save all customer service numbers for your banks in your phone
First Week After Arrival:
- ☐ Register your local address (mandatory in Germany, France, Japan, Netherlands)
- ☐ Apply for your tax/social identification number (SIN in Canada, TFN in Australia, SSN in USA)
- ☐ Visit your chosen traditional bank branch for account opening
- ☐ Provide your new local account details to your university scholarship office
- ☐ Set up all digital payment features (Zelle USA, Interac Canada, PayID Australia, Faster Payments UK)
Final Thoughts — Arrive Financially Ready
Your first week abroad sets the tone for your entire study experience. Students who arrive with a functioning bank account, a clear understanding of their local banking system, and the right digital tools in place start their academic journey with confidence. Students who arrive unprepared spend that critical first week stressed, overpaying fees, and missing opportunities.
The difference between these two outcomes is not money or privilege — it is preparation. Every step in this guide can be completed before you board your flight. The Wise account takes 10 minutes to open. The Monzo application takes 5 minutes. The Sperrkonto for Germany can be opened in a single afternoon. The pre-arrival Scotiabank StartRight application takes 20 minutes.
None of it is difficult. All of it is important. And all of it starts today.
Your student bank account abroad is not just a place to store money — it is the financial foundation that everything else rests on. Build it early, build it right, and your entire study abroad experience will be stronger for it.
Open your account today. Arrive ready. Thrive from day one.